
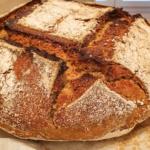
Sourdough Loaf
Ingredients
Units
Scale
Levain Build
- 20 g starter, fed & active
- 20 g whole wheat flour
- 20 g #65, all purpose flour
- 40 g water
Dough Mix
- 375 g #65, all purpose flour
- 55 g whole wheat flour
- 25 g rye flour (seigle)
- 345 g water
- 12 g salt
- 100 g levain build
Instructions
General Notes on Steps:
- Levain build: Builds on your sourdough starter.
- Autolyse: Allows the flour and water to fully hydrate. Can be 1-3 hours. Only flour & water.
- Bulk Fermentation: Stretching & folding, getting air incorporated into the dough, creating alcohols & acids, leavens the dough with gas.
- Preshape: First shaping, forming tension on the boule.
- Shape: Final shaping for the shape loaf you want.
- Rest & Proof: Final rise, slower, at a lower temperature, generally in the fridge.
- Bake: Can bake directly from fridge temp.
Build Levain (5-6 hours)
- Combine your fed, strong starter, whole wheat flour, all purpose flour & water.
- Let rise 5+ hours, until at least doubled in size, and before it starts to deflate.
- *Generally I do this the night before.
Autolyse (2 hours)
- Combine all flour & 320g water. Work this for several minutes, kneading it in the bowl. (no gluten = sticky dough, so you want to work this a bit)
- Cover. Let sit 1-3 hours. You want to be able to “window-pane” the autolyse at this point.
Mix
- Spread your levain build on top of the autolyse. Add salt. Add 25g water if needed (I haven’t needed this).
- Pinch with your hands to mix everything together.
Bulk Fermentation (4-5 hours)
- Preform 4 sets of stretch & folds (1 set: top, bottom, left, right), each 30 minutes to an hour apart. Then let rest for the remainder of the time. This allows the flour to ferment further, aerating it (making it rise), strengthening it, and developing flavor.
- Cover between each stretch & fold.
- Ideally, dough should rise 20-50%, and you should see bubbles under the surface, and dough should be slightly domed.
Preshape
- Lightly flour work surface.
- With your bench knife in one hand, and lightly floured other hand and using both the knife and your hand turn each half of dough on the counter while lightly pulling the dough towards you. This gentle turning and pulling motion will develop tension on the top of the dough forming a round circle.
- Let the dough rest for 25 minutes, uncovered.
Shape
- Lightly flour the top of your dough rounds and the work surface. Flip the round so the floured top is now down on the floured work surface.
- Grab the bottom of the round and stretch it lightly downward towards your body and then up and over about 2/3 the way to the top.
- Then, grab the left and right sides of the dough and stretch them away from each other, fold one side over toward the other and repeat with the other side.
- Then, grab the top of the circle and stretch away from your body and fold down to the bottom of the resting dough. You’ll now have a tight package that resembles a letter.
- Finally, flip, or roll down the dough so the seams are all on the bottom and using two hands cup the top part of the round and drag the dough gently towards your body. The angle of your hands will gently press the bottom of the dough on the counter creating tension, forming a skin on the top of the dough as you drag.
- After shaping, let the dough rest on the bench for a few minutes and then place seam-side-up into a towel-lined kitchen bowl that was lightly dusted with white rice flour.
Rest and Proof (overnight)
- Place your bowls containing your shaped dough in plastic bags sealed shut.
- Once covered, let the dough rest on the counter for 20 minutes.
- Place in refrigerator overnight
Bake
- The next morning, place your dutch oven in the cold oven, and preheat all for 1 hour at 232°C / 450°F.
- When you’re done preheating, take your loaf out of the fridge and unwrap it.
- Cut a piece of parchment paper so it fits over the top of your basket and place on a cutting board. Invert the board and parchment paper so they are resting on top of your basket containing your dough. Then flip the whole thing over. Remove the basket and your dough should be resting on the parchment.
- Brush off any excess flour you don’t want on the bread. Score the dough with a sharp blade.
- Take the dutch oven out of the oven.
- While wearing oven mitts/gloves, lift the parchment with dough and gently place in the dutch oven. Use a spatula to push down the paper into the corners of the pot.
- Cover the dutch oven, and put back in the oven.
- Bake 25 minutes.
- Remove the cover, and bake uncovered an additional 25 minutes.
- Internal temperature should be over 97°C / 208°F.
- Remove and let cool on wire rack for 2 hours.
Notes
From Website. And trial & error.